You’ve heard the saying that failing to plan is planning to fail. This quote rings true in the case of plastic manufacturing, where significant financial investment is required. Before investing in this field, it’s crucial to conduct due diligence. Fortunately, many scholars and business leaders have researched and established industry guidelines that can help you succeed, even if you’re new to the industry.
Design for Manufacturing and Assembly [DFMA] is a widely recognized practice that has repeatedly helped manufacturers streamline their production process and maximize their return on investment. The DFMA methodology is adjustable, so you don’t require prior experience or massive capital to adopt it, especially with the right manufacturing partner.
Below are the subtopics we’ll cover in this blog post.
- What is Design for Assembly [DFA]
- DFA vs DFD: Relationship Between Design for Assembly and Design for Disassembly
- Guidelines: 8 DFA Principles to Maximize Product Service Life
- How to Perform Design for Assembly [DFA] Analysis for New Plastic Product Development and Reengineering
- 5 Advantages of Integrating Design for Assembly (DFA) Framework in Plastic Manufacturing
What is Design for Assembly [DFA]?
Design for Assembly [DFA] is an engineering design methodology that encourages manufacturers to streamline the number of parts in a product and operations in the assembly line to reduce the time and cost of assembly. The Design for Assembly framework seeks to facilitate efficiency in all production areas to ensure easy and low-cost assembly.
Design for Assembly ensures that engineers and manufacturers adopt techniques and tools that improve their product’s usability and reliability. The building blocks for the Design for Assembly framework began in the 1960s in response to the growing need for manufacturers to create better product designs to speed up the robotic part-feeding and assembly process of that time.
In 1976, Geoffrey Boothroyd and his graduate students published a coding system for quick reference during the designing process. By the early 1980s, Geoffrey Boothroyd and Peter Dewhurst had launched the first DFA software, “Design for Automatic and Manual Assembly Software,” for the Apple II Plus. The software was so successful that IBM and Digital Equipment expressed interest in adopting it. This development led the inventors to incorporate Boothroyd Dewhurst Inc. in 1983.
By 1985, more companies had begun integrating this methodology into their production cycle to improve business outcomes. This success led the founders to launch the first Design for Manufacturing module and rebrand their product as DFMA. President George H.W. Bush awarded the founders the National Medal of Technology for “dramatically reducing costs, improving product quality, and enhancing the competitiveness of major U.S. Manufacturers” in 1991.
DFA vs DFD: Is There A Relationship Between Design for Assembly and Design for Disassembly
Yes, there is. While Design for Assembly allows you to simplify the assembly parts and process to reduce the cost and time of assembly, Design for Disassembly is a design practice that facilitates the economic recovery of product parts and materials when you dismantle or remodel the product.
In plastic manufacturing, this set of design principles supports repairing, upcycling, and recycling products at the end of their service life to enhance their appeal and usability. You can integrate this framework into several plastic manufacturing techniques, including injection molding, additive manufacturing, and CNC machining.
Design for Assembly and Disassembly Guidelines: 8 DFA Principles to Maximize Product Service Life
The Design for Assembly framework [DFA] is integrated early in the production cycle, simultaneously with the Design for Manufacturing methodology. Ideally, you should perform DFA before investing in tooling and prototyping. Implementing this strategy at the engineering design stage ensures you can correct errors before they become a concern in the manufacturing and assembly stages.
1. Analyze Part Count and Function
Review the number of parts that need to interact to perform a function to identify redundant components so you can reduce the number of pieces in the final product by combining part functions using built-in fasteners.
You should aim to minimize part count as much as possible as long as it doesn’t affect the integrity of the final product. The fewer the parts, the easier it is to manufacture and maintain.
2. Use Modular Design
A modular design is an engineering principle that encourages you to build products by incorporating smaller parts, called modules, into them. You can then independently create, replace, or alter each module to improve its functionality and lifecycle without jeopardizing the integrity of the overall product.
This principle fosters scalability and flexibility in the design process. It also allows you to reduce assembly time and unnecessary costs in the future.
3. Integrate Part Symmetry
Integrating part symmetry in product design allows you to assemble parts that fit into one another quickly and in multiple ways. Symmetry enhances the visual appeal and functionality of the finished product. To achieve balance in your design, create self-aligning and self-locating pieces. Doing so reduces the time and cost of assembly.
The standard styles in DFA are rotational and bilateral symmetry. Rotational symmetry allows you to connect the parts to a central point. In a bilateral, the final product comprises two halves.
4. Mistake Proofing [Poka-Yoke]
The Polka-Yoke method helps expose, prevent, and correct operator errors during assembly. To reduce mistakes in the assembly process, you should make the components impossible to install incorrectly. Start by making the component sizes and forms distinct and the installation process simple to understand.
You can add holes and pins to make it impossible for the handler to place the parts in the wrong way. You can also include an assembly guide or vision sensor in the assembly to detect poorly placed components.
5. Use Realistic Tolerances
You should measure the assembly process’ tolerance against the manufacturing technique’s capability. While achieving tight tolerances on plastic components is vital, it might only be necessary in some cases. Setting optimal tolerance levels that allow for minor variations from the nominal value will help reduce performance issues in the assembly process.
You can conduct a dimensional tolerance analysis to ascertain the number and effects of dimensional and geometric variations on product integrity.
6. Design for Ease of Feeding, Handling, and Fitting
The designer should consider how the parts will be fed, handled, and fitted into the whole to eliminate the need for special tools and fixtures during assembly. It also minimizes the risk of damage when assembling the components. Review your product’s size, weight, and complexity to ensure you’ve optimized them for handling and orientation.
Heavy or delicate parts will cause problems in the assembly stage, and pieces with sharp edges can be hazardous to workers. You should design the components to be firm for holding and inserting during assembly.
7. Design Using COTS Parts
To reduce assembly time, assembly steps, and overall production cost, you can purchase machined or molded parts directly from your supplier rather than manufacturing them yourself. Commercial Off The Shelf (COTS) parts are standardized and easy to assemble. These are also easy to replace if they wear out or go missing.
This principle also supports using automated assembly software to streamline the process. You can easily automate the assembly process with minimal human interference since commercial parts are symmetrical and have realistic tolerances.
8. Conduct Assembly Sequence Testing
Develop an assembly sequence plan to measure your product design’s feasibility, complexity, and accuracy. To test the assembly sequence of your assembly process, use an assembly sequence diagram to determine how the parts, sub-assemblies, sub-components, and tools interact with one another in the assembly process.
You can also create an assembly simulation to make the test more realistic and interactive. This test allows you to compare different assembly sequences and directions. It also exposes redundancies in the assembly operations.
How to Perform Design for Assembly [DFA] Analysis for New Plastic Product Development and Reengineering

If you’re new to Design for Assembly [DFA] analysis and would like to understand the steps involved in manually and automatically analyzing the viability of your final product and assembly process, read on. We’ve outlined the key steps to help you get started.
Step 1: Establish the Product Structure
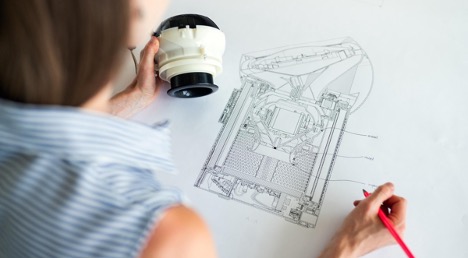
The first step in the DFA analysis is to build the product structure—this is the initial design concept. A product structure enables you to ascertain the assembly process, part count and type, sequence of operations, and tools needed for the assembly operation. To conduct this analysis, create a part list or bill of material that outlines the raw materials, sub-assemblies, sub-components, parts, and quantities in each assembly run.
You can develop and maintain the product structure manually. Start by inputting data into a spreadsheet and sketching a 2D image of your assembly process on CAD software. On the other hand, the DFA software comes with an in-built product structure chart to facilitate the analysis.
Step 2: Set DFA Parameters
Production parameters define the scope of the project. You can start by creating a checklist of questions based on established Design for Assembly (DFA) principles. Doing so makes it easier to communicate product requirements to the design engineer, supplier, and contract manufacturers.
The checklist should include questions such as: Does the assembly method affect the product’s visual appeal? Is there a need for a distinct environment to assemble the parts? Are there parts that can’t be aligned or located? What level of expertise will I need in the assembly stage? What is the most suitable material and method for surface finishing? What dedicated tools and fixtures does the team need for product assembly? What is the overall cost of the assembly process?
Step 3: Answer Questions for Each Aspect of the Assembly
Answering the questions from the checklist allows you to determine the scope of the project, particularly the projected production cost, assembly time, product size, shape, and weight. This stage of the DFA analysis requires the collaboration of a cross-functional team, including the designers, quality inspectors, material suppliers, tool makers, and parts manufacturers.
Creating a digital simulation of the product and assembly process allows you to visualize and test the reliability and durability of your product and assembly sequence. In this phase, you can create prototypes to ascertain the product’s form and quality.
Step 4: Review Results
Once you’ve answered the questions from the DFA analysis and visualized the product, the next step is to review and improve the results. In the DFA methodology, the Design for Assembly Index allows you to measure the efficiency of the assembly. A higher index value signifies a higher efficiency and vice versa. You can use the index values to compare the efficiency of multiple design concepts to help stakeholders make better decisions.
Based on the final decision of the stakeholders, you can tackle the failure areas uncovered during the analysis. In union with the cross-functional team, the manufacturer can brainstorm redesigning ideas that align with the DFA principles and conduct feasibility studies on each concept to eliminate potential risks.
5 Advantages of Integrating Design for Assembly [DFA] Framework in Plastic Manufacturing
Reduces Supply Chain Costs
Design for Assembly helps reduce supply chain costs. An optimized assembly line makes other stages of the production cycle easier to manage. A well-implemented DFA strategy minimizes waste during packaging, inspection, shipping, haulage, and installation. In this way, manufacturers can avoid additional production costs.
By optimizing the design modularity, part counts, symmetry, and flexibility of the products, manufacturers can create agile supply chains that reduce overhead costs and adapt to changing market dynamics.
Reduces Assembly Time
An effective Design for Manufacturing and Assembly (DFMA) framework aims to reduce time to market to maximize market share. By combining product parts based on their functions, manufacturers can eliminate unessential tasks in the assembly line, thus reducing overall production time.
An automated DFA framework can predict the overall assembly time by considering the number and complexity of operations. This framework also identifies and minimizes the number of assembly reorientations to reduce the overall assembly time.
Enhances Product’s Ease of Use
The value of a great product design is determined by its ease of use. Design for Assembly methodology enhances user experience by optimizing the product structure to boost the functionality and visual appeal of the final products.
Manufacturers who adopt this framework provide fewer part counts and fasteners, minimal handling and fitting difficulties, and reduced maintenance requirements so that users can easily focus on obtaining the product’s value.
Improves Reliability of Final Products
Products built from DFA are reliable. The Design for Assembly (DFA) framework comprises tools and techniques that manufacturers can use to predict and optimize the product’s reliability and durability to align with the demands of its service environment.
By standardizing product parts and digitizing operations, manufacturers can identify potential defects and errors in the manufacturing and assembly processes and implement supporting systems to minimize these errors.
Fosters Sustainability
One of the ways plastic manufacturers can reduce their carbon footprint is to implement strategies that support green practices. Design for Assembly seeks to lengthen the service life of plastic products.
By optimizing the final products for easy repair, maintenance, upcycling, and recycling, these manufacturers are reducing the need to continuously manufacture virgin plastic products since their waste contributes to pollution.
Final Thoughts
You should invest in Design for Assembly if you’re looking to test the feasibility of your product idea or mass produce on a strict budget. This efficient design methodology lets you save money and time throughout the process. As a plastic manufacturer, integrating this framework into your next manufacturing project will give you maximum control over your production cycle.
This framework is collaborative, scalable, and repeatable, meaning you can adjust the scope of your operation on the go. The best part is that we can help you seamlessly integrate the DFMA framework into your production cycle. PTI TECH has the creative prowess, engineering expertise, and advanced technology to tailor our manufacturing solutions to your needs and budgets.
Contact us today to learn more about our plastic manufacturing capabilities.